Switches
D-Link DGS-1016A
I have one these D-Link DGS-1016A 16-port gigabit unmanaged switches in my network.

As I got into home automation and adding things like smart hubs in the office I needed more ports. I love my 8-port D-Link switches and this is the 16-port version.
D-Link DGS-2208
I have two of these D-Link DGS-2208 8-port gigabit unmanaged switches in my network.
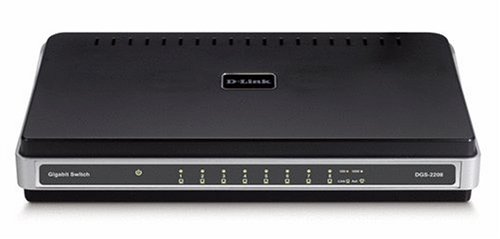
There are cheaper items today (this is an older model), but these have been totally solid since I bought them. If/when I need new switches, I’ll be looking at getting the updated version of this switch.
TP-LINK TL-SG1008D
I have one TP-LINK TL-SG1008D 8-port gigabit desktop switch in the network.
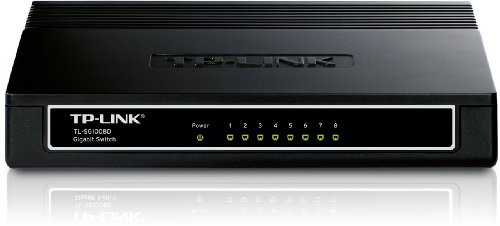
I picked this up as an alternative to the DGS-2208 when I needed another switch upstairs but the DGS-2208 was an older model.
HP ProCurve 2810-24G
When I updated to Ubiquiti UniFi equipment I replaced the two smaller unmanaged switches sitting under the desk with this larger 24-port managed switch.
It’s a little older, but it does gigabit Ethernet and gets the job done.
I found the configuration via console to be somewhat challenging so I have a lot of notes about that.
Console Connection
To connect a console to the switch, use the console cable shipped with the switch and connect a PC or VT-100 terminal to the console serial port (e.g., PuTTY or KiTTY). The PC or terminal then functions as a management console connected directly to the switch.
Use the settings:
A baud rate from 1200 to 115200 (the switch senses the speed)
8N1 (8 data bits, no parity, 1 stop bit)
Xon/Xoff flow control
After connecting you won’t see anything happen immediately! Press Enter two or three times to have the switch sense the speed and finish connecting.
On Windows you can use the mode command to show the list of available COM ports. Note the USB COM port adapter may show the connection as something low like 1200 baud but you can set the terminal program to something higher and it works. Also, it may be better to connect the cable to the switch first and then attach the USB connector to the computer. It seems some auto-detection happens in that scenario.
Commands
Hit TAB at the prompt to list commands. This also does autocomplete for commands where available.
setup- launches the GUI menuconfig- starts configuration via CLI
Set timezone and network time protocol details (timezone is GMT offset in minutes):
2510_01# write memory
2510_01# config
2510_01(config)# time daylight-time-rule continental-us-and-canada
2510_01(config)# time timezone -4800
2510_01(config)# timesync sntp
2510_01(config)# sntp unicast
2510_01(config)# sntp server 10.10.20.69
2510_01(config)# show time
2510_01(config)# show sntp
2510_01(config)# write memory
The SNTP server can be any reachable NTP server. You may have to use the GUI menu to tweak the “protocol version” on the SNTP server - using protocol 7 means it accepts pretty much anything from protocols 1 - 7. You may need to reboot the switch to force a sync, too.
Enable HTTP management and disable HTTPS. The switch is old enough that the HTTPS self-signed certificate isn’t strong enough to satisfy browser requirements. Also, your browser needs to have Java on it so you may be stuck with IE11 or something:
2510_01(config)# no web-management ssl
2510_01(config)# web-management plaintext
Set manager and operator username and password:
2510_01(config)# password manager user-name admin
2510_01(config)# password operator user-name monitor
Save and view the configuration:
2510_01(config)# write memory
2510_01(config)# show run